
Last year, my ecologist friend and I made some mason bee houses because, well, there are fewer and fewer places for them to take up residence and fewer and fewer pollinators out there. Basically, we’d like to keep eating food that comes out of the ground, so we picked up some wood scraps, grabbed some circular saws and drills and went to town one Sunday afternoon.


It turns out, these little houses (some people call them “bee hotels”) were so fruitful and good-looking that they allowed me to spread my wings as well, though to slightly fancier quarters to a resort in the hills of California. I was asked to teach a workshop on how to make these little abodes with a bunch of other handy people at the Craftsman MAKEcation event, and since it’s the perfect time of year to build them, I figured I’d post how to do them here as well. So, here are the deets:

Making some homes for nonthreatening little pollinators at last year’s MAKEcation.
WHY YOU MUST LOVE MASON BEES
- They are gentle beings, with stings no stronger than a mosquito bite. In fact, they are generally promoted as not stinging at all. So stop judging them!
- They are very efficient pollinators; only a few hundred are needed per acre. The dramatic decline of the honey bee population has led to small or misshapen fruit (or no fruit at all). These little mason bees have helped bring back trees that hadn’t produced fruit for years.
- They are remarkably easy to keep, having few pest or disease problems and minimal management needs.
- They are industrious little buggers and fun to observe in action.
TOOLS YOU’LL NEED
- Cordless drill (or, if you’re drilling into old growth wood, you may want a drill press)
- Extra-long drill bit (need to be able to drill 3-5″ deep)
- Sand paper (100 grit)
- Miter saw (any kind of saw will work–these are quicker and easier if you’re cutting angles for a roof)
- Brad nailer and nails (also optional, you could screw these boards together if you prefer)
- Tape measure
- (Optional) Paint brushes and paint – the bees seems to especially like blue and yellow
TIPS ON MAKING THEIR HOMES
- Avoid pressure treated wood.
- Avoid aromatic woods like cedar.
- Make sure wood is at least 4” thick (I would recommend it be 6-7” thick).
- Lay out a series of holes approximately 1” apart.
- Drill holes to between 3-5” deep (do not drill all the way through wood).
- Keep hole diameter close to 5/16”.
- Keep dry by creating an overhanging roof.
SETTING OUT YOUR NESTING BLOCKS
- Put out in early spring. They are only around for 6-8 weeks, then the rest of the year the new generation will be in the holes developing until winter and then hibernating until spring.
- Mason bees begin to emerge at around the same time that crocuses and forsythias bloom.
- Place under eaves, decks, or other protected spots (if there is an overhanging roof on the house you build, this isn’t really necessary).
- Their houses should always face south or east, receiving some morning or early afternoon sun, and be placed so that the holes are horizontal.
- Mason bees also require a source of clay or mud to build their nests. Dig a small pit around a foot deep and make sure it’s open and accessible throughout the active season.
Super easy and pretty crucial for our ecosystem, so just set a few hours aside and feel really good about this project.

One of the bee homes from the event. They come in all shapes and sizes. As long as you drill the holes properly and set them out as described, they will work!
Also, if you’re looking for actual hands-on workshops—er, workshops that are free and involve good eating, drinking and entertainment in between the hands-on stuff, the next MAKEcation is coming up this summer. TIP: From now through July 31, Craftsman Club members can enter for a chance to win a trip to the Craftsman MAKEcation event by visiting www.craftsman.com/makecation. In 2014, I learned everything from blacksmithing techniques to how to properly grill a fish, and also became friends with a chainsaw artist named Curtis (include photo). I don’t know where you all live, but these are things that just don’t happen in Chicago. This year, Craftsman is kicking the action up a notch by bringing some of the nation’s top tool experts, artists and mechanics to sharpen your existing skills and to teach you new ones. They also happen to be partnering up with the World Maker Faire and providing a free ticket to attend the event, which will be held in Brooklyn at the same time. Huge perk.
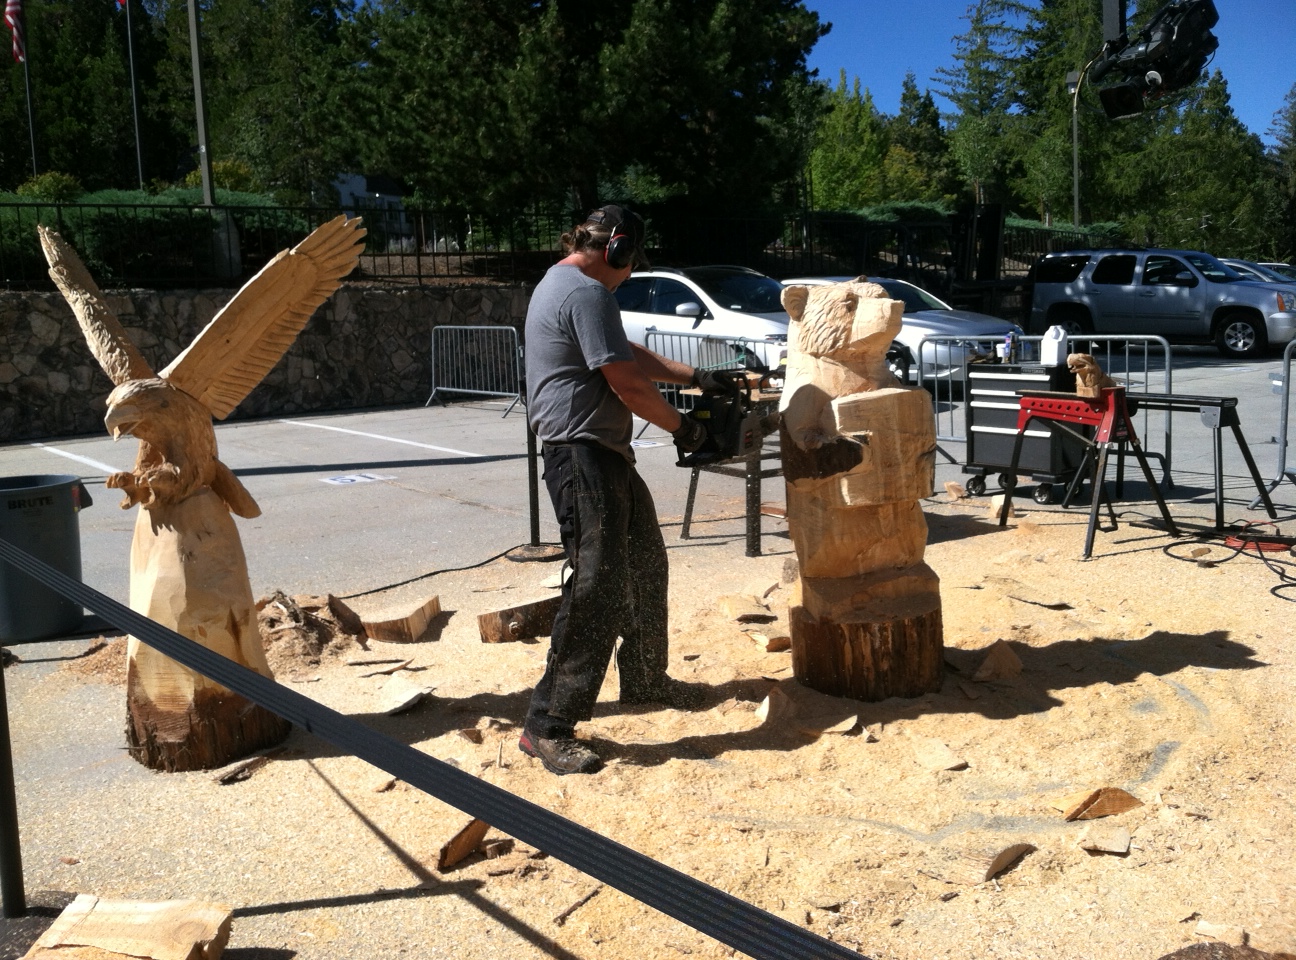
Curtis! He carved these out so quickly it was astonishing. But here’s a tip: don’t sneak up behind a chainsaw artist when he or she is working.
So, go get your hands dirty and do something good for our environment and our food supply. Then sign up for discounts and a possible free making vacation to learn even more ways to get your hands dirty.
THEN, Check back at ToolMade to hear follow-up about the incredible group in Detroit that we’re working with next month. Yes, all this sunshine and non-arctic weather has me energized and bossy. But it’s all for the greater good.
Happy Spring!

